How to Build Machine Learning Apps with the IBM Visual Recognition API- Part 1
Traditional computing is long gone and the reason for that is mostly the complexity of the problems. Earlier mathematical problems were solved through programmable computing but over the years, evolution has led to the introduction of cognitive computing. The concept of cognitive computing has helped solve problems which are decision-based. These are real-life situations which go beyond the ability of a traditional programmable process.
With the increasing use of big data and study of data patterns, it is necessary to transform the decision-making process and create ‘smarter’ computers. With this in mind, IBM recently ventured into the field and developed IBM Watson. Watson functions with decision-making abilities similar to humans and helps solve complex problems.
Visual recognition is one of the most widely implemented concepts that power a plethora of applications from self-driving cars to identifying famous locations. With the IBM Cloud, we will look into how you can build your own application that takes in an image and identifies what’s there in the images.
We will build a simple application that talks to the IBM Cloud Visual Recognition API to identify images. Though IBM cloud provides SDK to many different languages, we will be using simple HTML with JQuery to build the app. This article has been divided into two major parts.
- The first part deals with using the existing provided by IBM Cloud to see how it works with a use case
- The second part deals with how we can train custom models and bring in functionalities that are more tailored to specific data that wasn’t provided by IBM.
Part 1: IBM Visual Recognition API with pre-trained models
Let’s build a use case. Assume that you are a fitness freak and you count the calories you eat. You are also curious to know more nutritional values present in a food item. To make your life easier, let’s build an application that lets you upload an image of a food item and gives you the calories count for that food item and possibly some other information about that food item. Now, let’s begin towards building this solution.
Note: All the code snippets used below are just for the sake of explanation, and they aren’t complete. Link to the complete working code can be found at the end of the article.
1. Getting the environment set up
The first step is to register with the IBM cloud platform. The free tier allows you to build and test many of the cloud features. Today we are looking at the Visual Recognition service.
Once you sign-up and go to the visual recognition dashboard, you will be able to navigate to the Watson Studio for Visual recognition. Here, you will be able to see all the various image services provided by IBM Cloud.
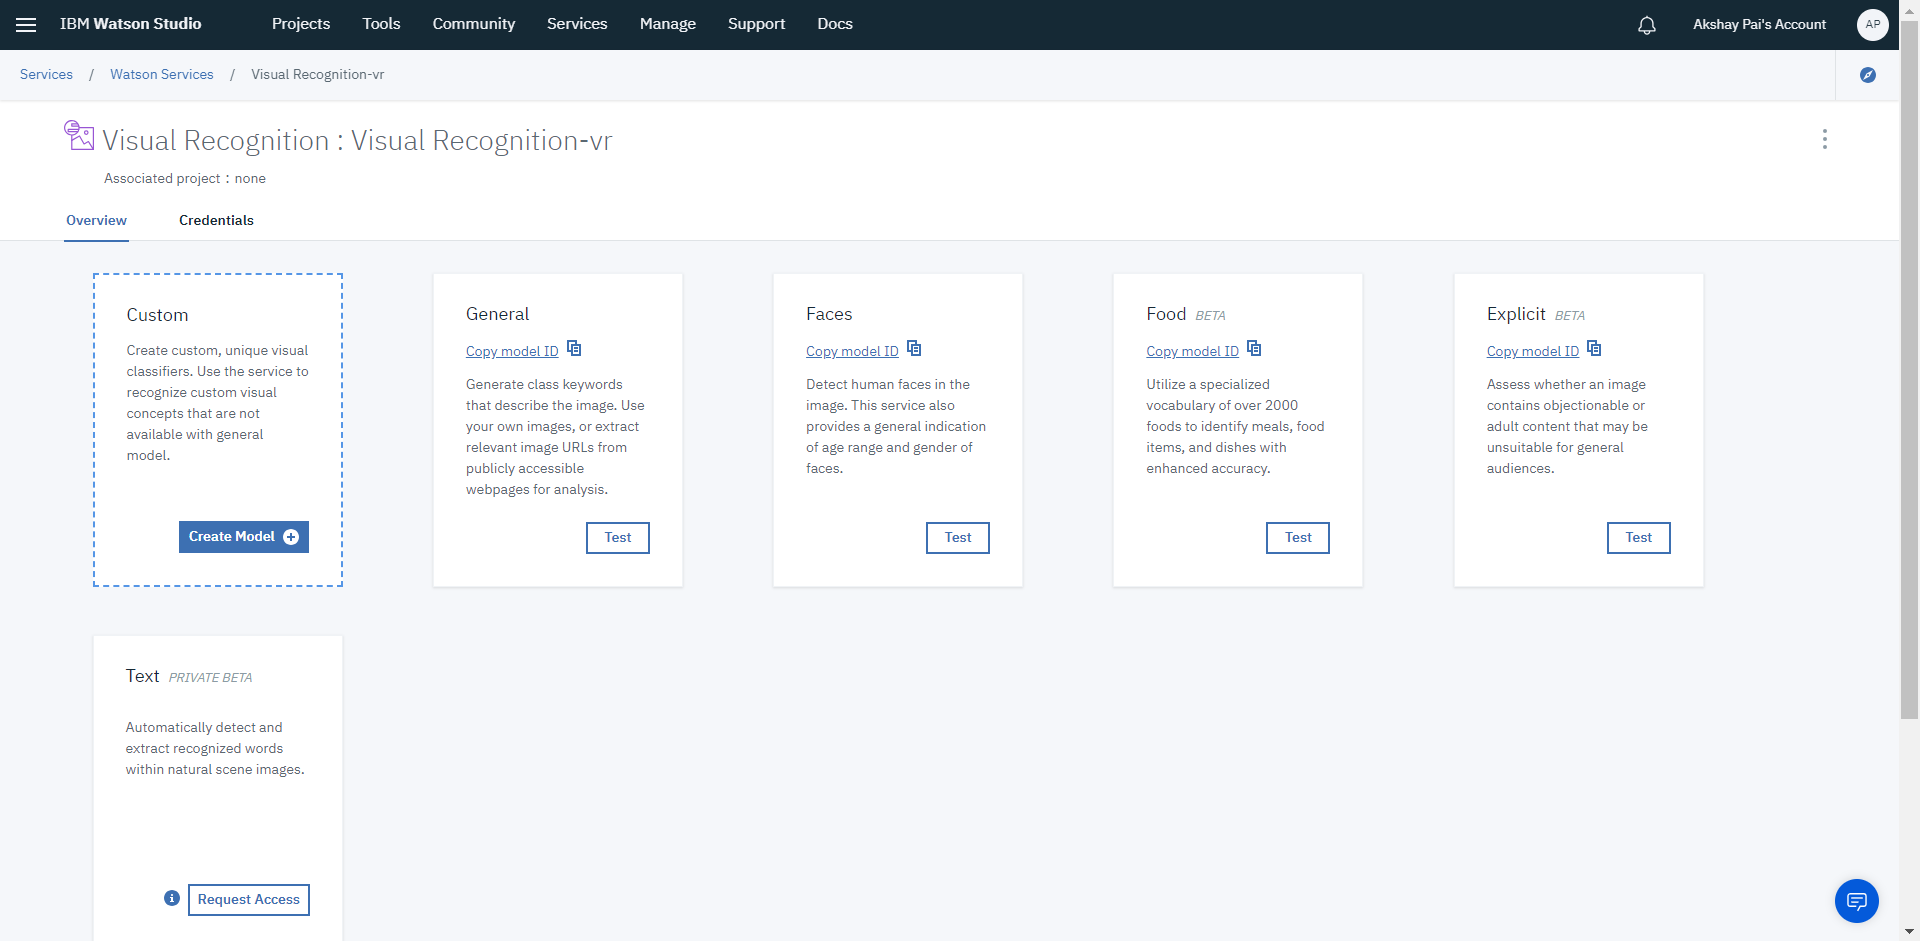
As you can see, IBM provides a variety of services, from generic image models to specific uses cases such as face detection, food extraction, explicit event identification and also extraction of text from images ( Optical Character Recognition)
For the use case that we have built, we will be using the food service. Let’s test that out on the studio first!
2. Testing Visual Recognition with Watson Studio
Without building an application, you would be able to test the API to see how it responds. In, the Watson Studio, let’s explore the Food. Click on the test button as seen in the image above.
Once you are in the test window, you can see that you have the option to upload images.
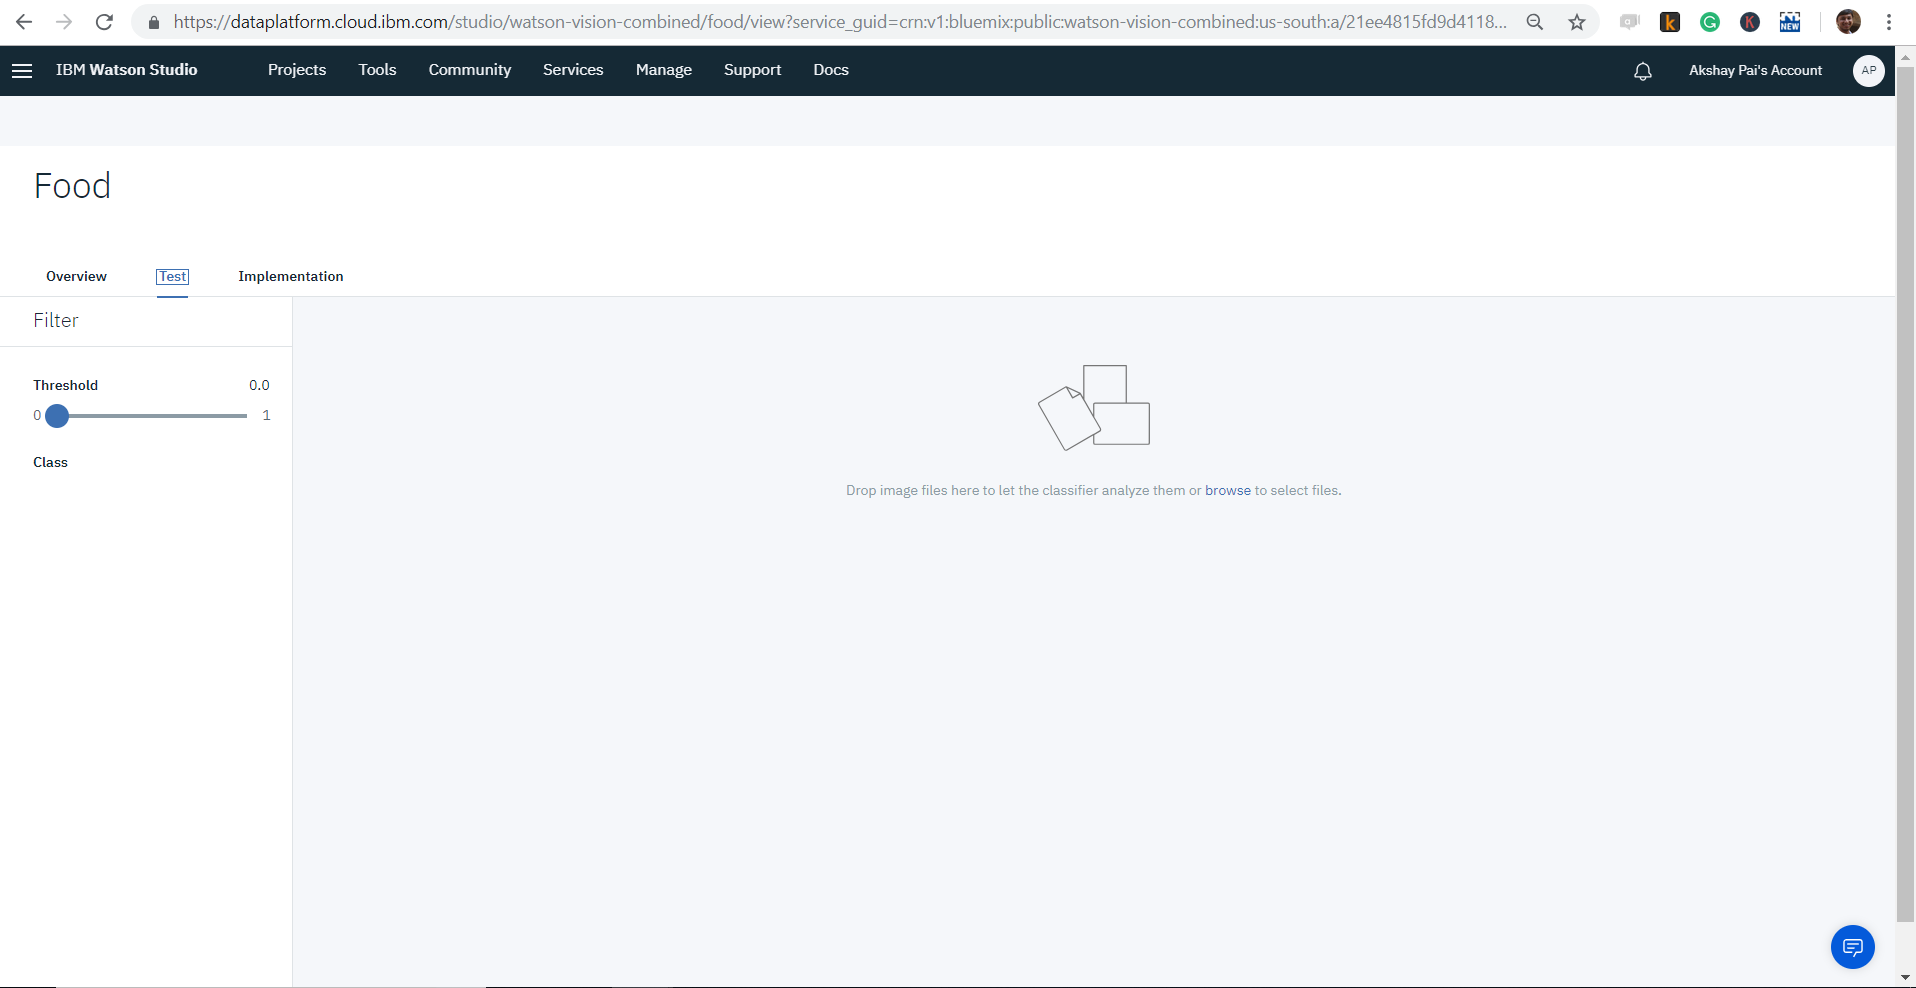
On the left side of the screen, you can see the threshold parameter. You can vary it between 0 and 1. This is an important parameter.
Each time IBM tries to recognize food, it gives you how confident it about the answer. For example, it might be 80% sure that the image has an apple. This translates to 0.8 on the threshold scale.
Another example is that the Visual Recognition AI might be 67% sure that the image has a burger in it. As you might have guessed, this translates to 0.67 on the threshold scale.
The threshold value conveys the IBM platform to show results, only if the confidence score of food identification is above that threshold point. There is no fixed way to determine which is the best threshold point. We would have to find it through trial and error methods.
3. Analyze the outcome for test images
Now that our environment is ready, we can test what we get as results for a few images.
Following images are tested with a threshold of 0.7 (70% confidence). The first image is a pizza, the second one is a hamburger, the third one is a frittata and the last one is an image of a bunch of fruits.
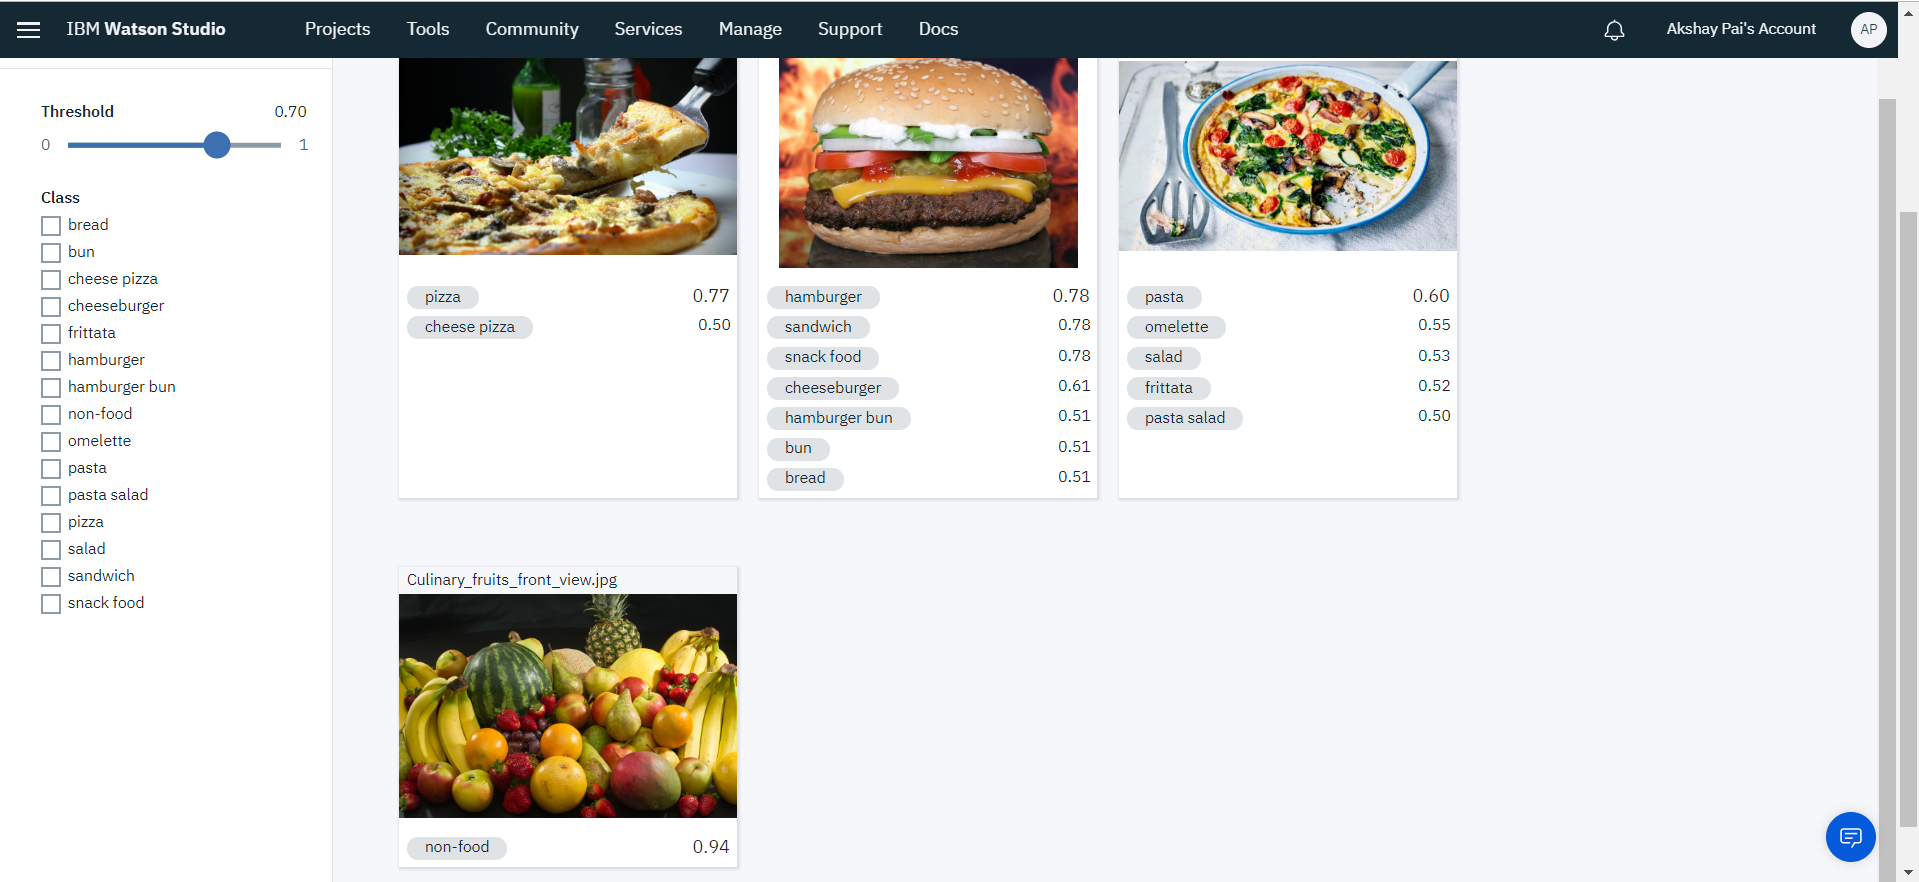
From the image above, we can observe the following outcomes:
- Pizza has been identified perfectly
- Hamburger has been identified perfectly as well but it has a bunch of other tags that are above 70%. They might be relevant, but not to our use case.
- Frittata has been identified, but the confidence level is much lower than what we had set, so, that cannot be considered.
- The fruits are classified as a non-food item.
From this, we can deduce that, for some sections, the pre-built model works perfectly but for some others, it needs improvements. In part 2, we will look at how we can improve this. For now, let’s build an application that can be used to upload images and show results.
If you are interested in learning to build applications with IBM cloud, I would recommend you to check out this course: IBM Masterclass
4. Building a Simple Web Application
Let’s use JQuery and HTML to build a simple UI to help us test the results for different types of images.
The application will take an image URL as input and send that over to the IBM Visualization API and get the responses.
We can also build a UI which talks to a backend application and provide file upload functionality. For example, using Python REST API to provide file upload functionality.
To explain the features, i’ve included only code snippets in the various sections below. The link to the complete working code can be found at the end of this article.
4.1 User Interface
Let’s build a simple interface using HTML and CSS. I have made use of material design lite library to make use of pre-built components such as cards.
<div class="mdl-card mdl-shadow--2dp" style="margin: auto;width:32%;margin-top:23%;height:450px">
  <div id="display_img" class="mdl-card__title mdl-card--expand  mdl-card--border" style="background-image:url();background-size: contain;">
    <h2 class="mdl-card__title-text">Image</h2>
  </div>
  <div class="mdl-card__supporting-text" style="height:75px">
    IBM Visual Recognition API demo. Identification of the food item from an image!
  </div>
  <div class="mdl-card__actions mdl-card--border">
	<input type="text" placeholder="Enter Image URL" id="imageURLholder" class = "mdl-textfield__input"><br>
	<button id="analyze" class="mdl-button mdl-js-button mdl-button--raised mdl-button--colored" style="margin-left:35%">
		Analyze
	</button>
  </div>
  <div id="resultdiv" class="mdl-card__actions mdl-card--border">
	<Span> <strong>RESULT</strong> </span><br>
	<div class="mdl-card__supporting-text" id="Result">
	</div>
  </div>
</div>
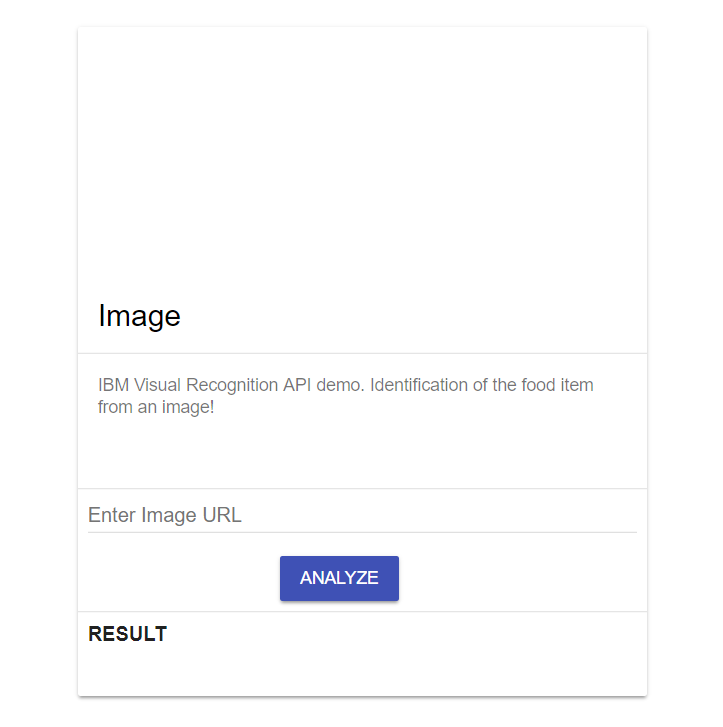
With a few lines of code, we are defining a card with three sections.
- Section 1 will show the preview of the image
- Section 2 provides the field to add the image URL and request for it to be analyzed
- Section 3 will show the results fetched from IBM Visual Recognition API
Here is how the UI looks with this code
4.2 Application Features
Once we have the UI complete, we can add the functionality for it to accept an Image and send it over to IBM for analysis. The functionalities are written in Javascript by making use of the JQuery Library
4.2.1 Image Preview
var imgurl = "";
	jQuery(document).ready(function($) {

		$('#imageURLholder').bind('input', function() {
		    $('#display_img').css('background-image', "url(" + $(this).val() + ")");
			imgurl = $(this).val();
		});

		$("#analyze").click(function(){
			send_request(imgurl)
		});
The code snippet above binds the user input field to an event that constantly monitors for changes. Each time a new URL has been entered, it will fetch the image and render it in the image view section of the UI.
4.2 IBM Visualization API call
function send_request(url){
		$.ajax
		({
			type: "POST",
			url: "https://gateway.watsonplatform.net/visual-recognition/api/v3/classify?version=2018-03-19&url=" + url,
			headers: {
				"Authorization": "Basic " + btoa("apikey" + ":" + "EYq40Eih1lsT8Q3p8JrvV56S_vj3nbO1lLePkM4OBYhy")
			},
		success: function (response){
			console.log(response["images"][0]["classifiers"][0]["classes"][0])
			update_result(response);
		}
		});
	};
The method above takes the
Remember to change the “YOUR_API_KEY” to your actual key that has been provided for your IBM API resource.
4.3 Updating Results
function update_result(response){
		var classification = response["images"][0]["classifiers"][0]["classes"][0]
		var food_name = classification["class"]
		var confidence_score = classification["score"]
		var hierarchy = classification["type_hierarchy"]
		$('#resultdiv').html("")
		$('#resultdiv').append("<Span> <strong>RESULT</strong> </span><br><span> <strong> Food: </strong>" + food_name + "</span><br>")
		$('#resultdiv').append("<span> <strong> Confidence Score: </strong>" + confidence_score + "</span><br>")
		$('#resultdiv').append("<span> <strong> Hierarchy: </strong>" + hierarchy + "</span><br>")
		$('#display_img').css('background-size', "contain");
	};
This method updates the result on the result section of the UI. It parses the response that has been provided by the IBM cloud API and fetches all the relevant information.
Some of the details fetched are:
- The food item that has been identified
- The confidence score for the identification
- The location of the food item in the hierarchy
5. Testing the Application
The gif below shows the application in action. We first paste the URL of a burger image and then we analyze it. We can see that IBM correctly identifies that it’s a burger with 97% (0.97) confidence.
Secondly, we paste another URL where the food item is samosa, an Indian snack. This too is correctly recognized.
This is the power of the IBM visual recognition for food. We can test for a variety of different food items and evaluate the images for which it doesn’t work as expected. We can use this later to improve the accuracy of visual recognition.
Conclusion
We have seen the power of machine learning that any organization can benefit from. With just a few lines of code, we are able to test and validate our use case.
IBM Visual Recognition API comes with a lot of benefits such as:
- Ease of Integration
- Availability of multiple dev environments like NodeJS, Python, Java, etc, it’s easy to adapt into existing systems.
- Built for scale. The platform can handle huge loads of requests at blazing fast speeds.
We have seen that IBM performs exceedingly well for some of the types of data. This does not mean that it can identify any type of food under the son. In such cases where you would want additional functionality, we will be able to train the IBM systems better to learn the new types of food. In part 2 of this article, we will look into how we can improve the recognition of newer food items.
Complete code can be found on my Github Profile: UI code IBM API

