1 Introduction
I had used putty for my amazing Raspberry Pi project. All my initial experiences have been combined into a set of points that detail on errors that occurred as well as how we ere able to solve it.
Raspberry Pi: Make a Bench automation computer![]() , is another awesome project to work on, if you are interested in Raspberry Pi.
, is another awesome project to work on, if you are interested in Raspberry Pi.
Remote connections can be established with system over a network through SSH (secure shell) easily, we can login, perform actions or send commands to another system remotely trough this conection on the commandline. But what we cannot do is launch a GUI application for viewing content present in the remote node. This is the disadvantage of using ssh in a terminal.
But this disadvantage can be easily solved by making use of “putty”, a remote login application which can not only be used to login to a remote node, but also launch GUI applications. Examples of GUI applications are Browser, text viewers, etc.
This tutorial concentrates on installing and using Putty on a raspberry pi cluster running Raspbian OS and MPICH2 (message passing interface). We use putty to view some text files using the “leafpad” application and browsers like “Netsurf” and “Dillo” that are pre existing on any version of Raspbian. We will also look into saving the setting, so that the second time onwards, its just a click to load the settings.
2 Installing and launching Putty
Putty can be installed through terminal. Run the following command:
sudo apt-get install putty
Once installed, test if it has been successfully installed by running it. To run it there are two ways:
1. type the command in the terminal:
putty
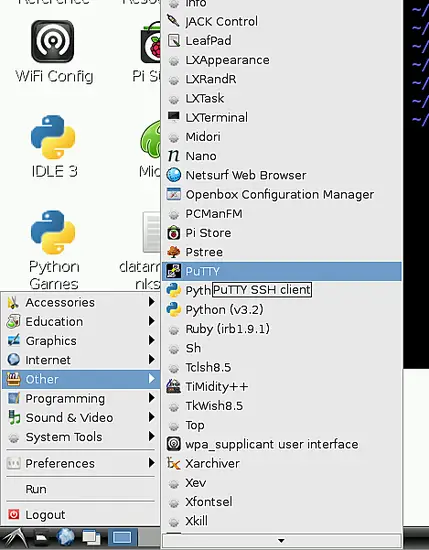
2. or you can also launch through the menu, as shown in the following image:
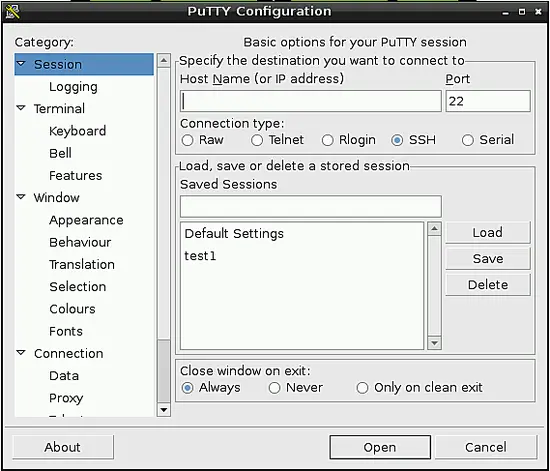
Once you open putty, it will look like the image below.
3 Configuring Putty
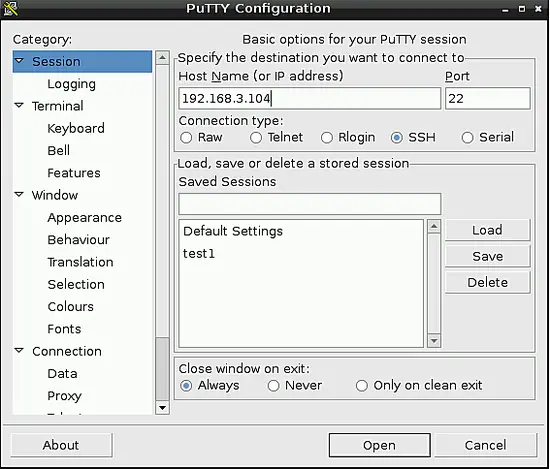
Once putty is launched, we first enter the IP of the node we want to connect to in the “Host Name” field located in the session window. Here we log into the IP “192.168.3.104”. Refer to the image below to enter the IP:
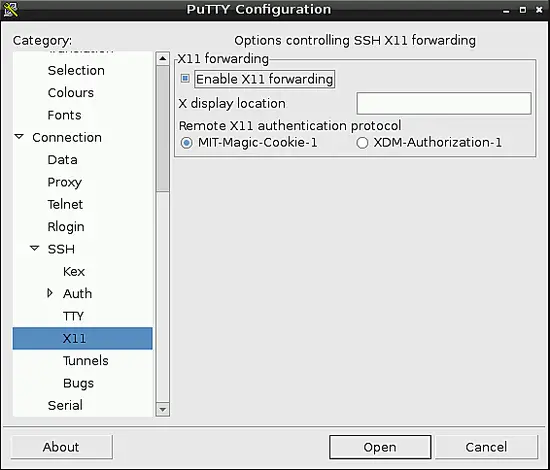
Once the IP is configured, we will have to enable X11, which enables us to run GUI based applications from the remote node. To do so, follow the steps:
- On the left panel of putty, scroll down and select the SSH option.
- After clicking on SSH, you get many options, click on the “X11” option , which is present in the left panel.
- Once X11 is selected, check the option that says “Enable X11 forwarding” on the right side.
Once the above steps are done, the putty window must look like the image below:
4 Connecting to the remote node
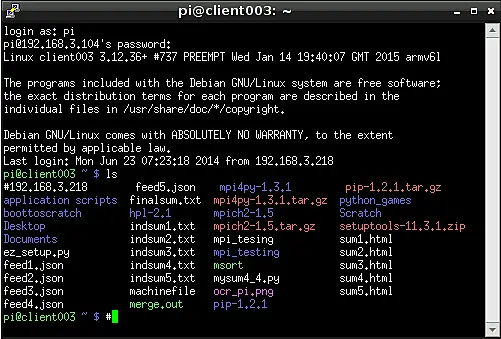
Once X11 forwarding is enabled, click on the open button present at the bottom of the putty window.This opens a connection with the remote node with the IP “192.168.3.104” and you can see a terminal. Also I have run the “ls” command just to show the files that are present in the remote node I have logged into. It looks similar to the image below
5 Opening HTML files in browser
The way in which we can open HTML files in raspberry pi remotely depends on the browser being used. Here I will show you to use Dillo and Netsurf to open an existing HTML file called “sum1.html”.
5.1 Using the Netsurf Browser
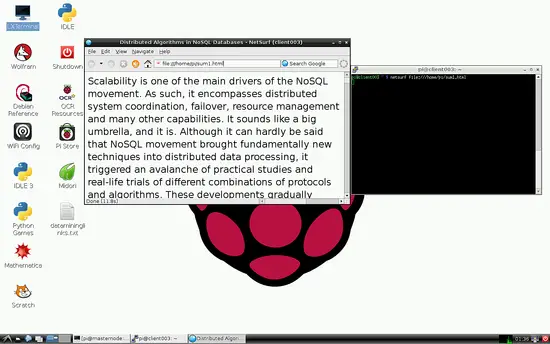
To open the file “sum1.html”, we type the following command in the terminal:
netsurf file:///home/pi/sum1.html
The following image shows the command and the Netsurf browser that has opened.
For other GUI applications and settings savings option, read my full tutorial on HwotoForge Here.