Introduction
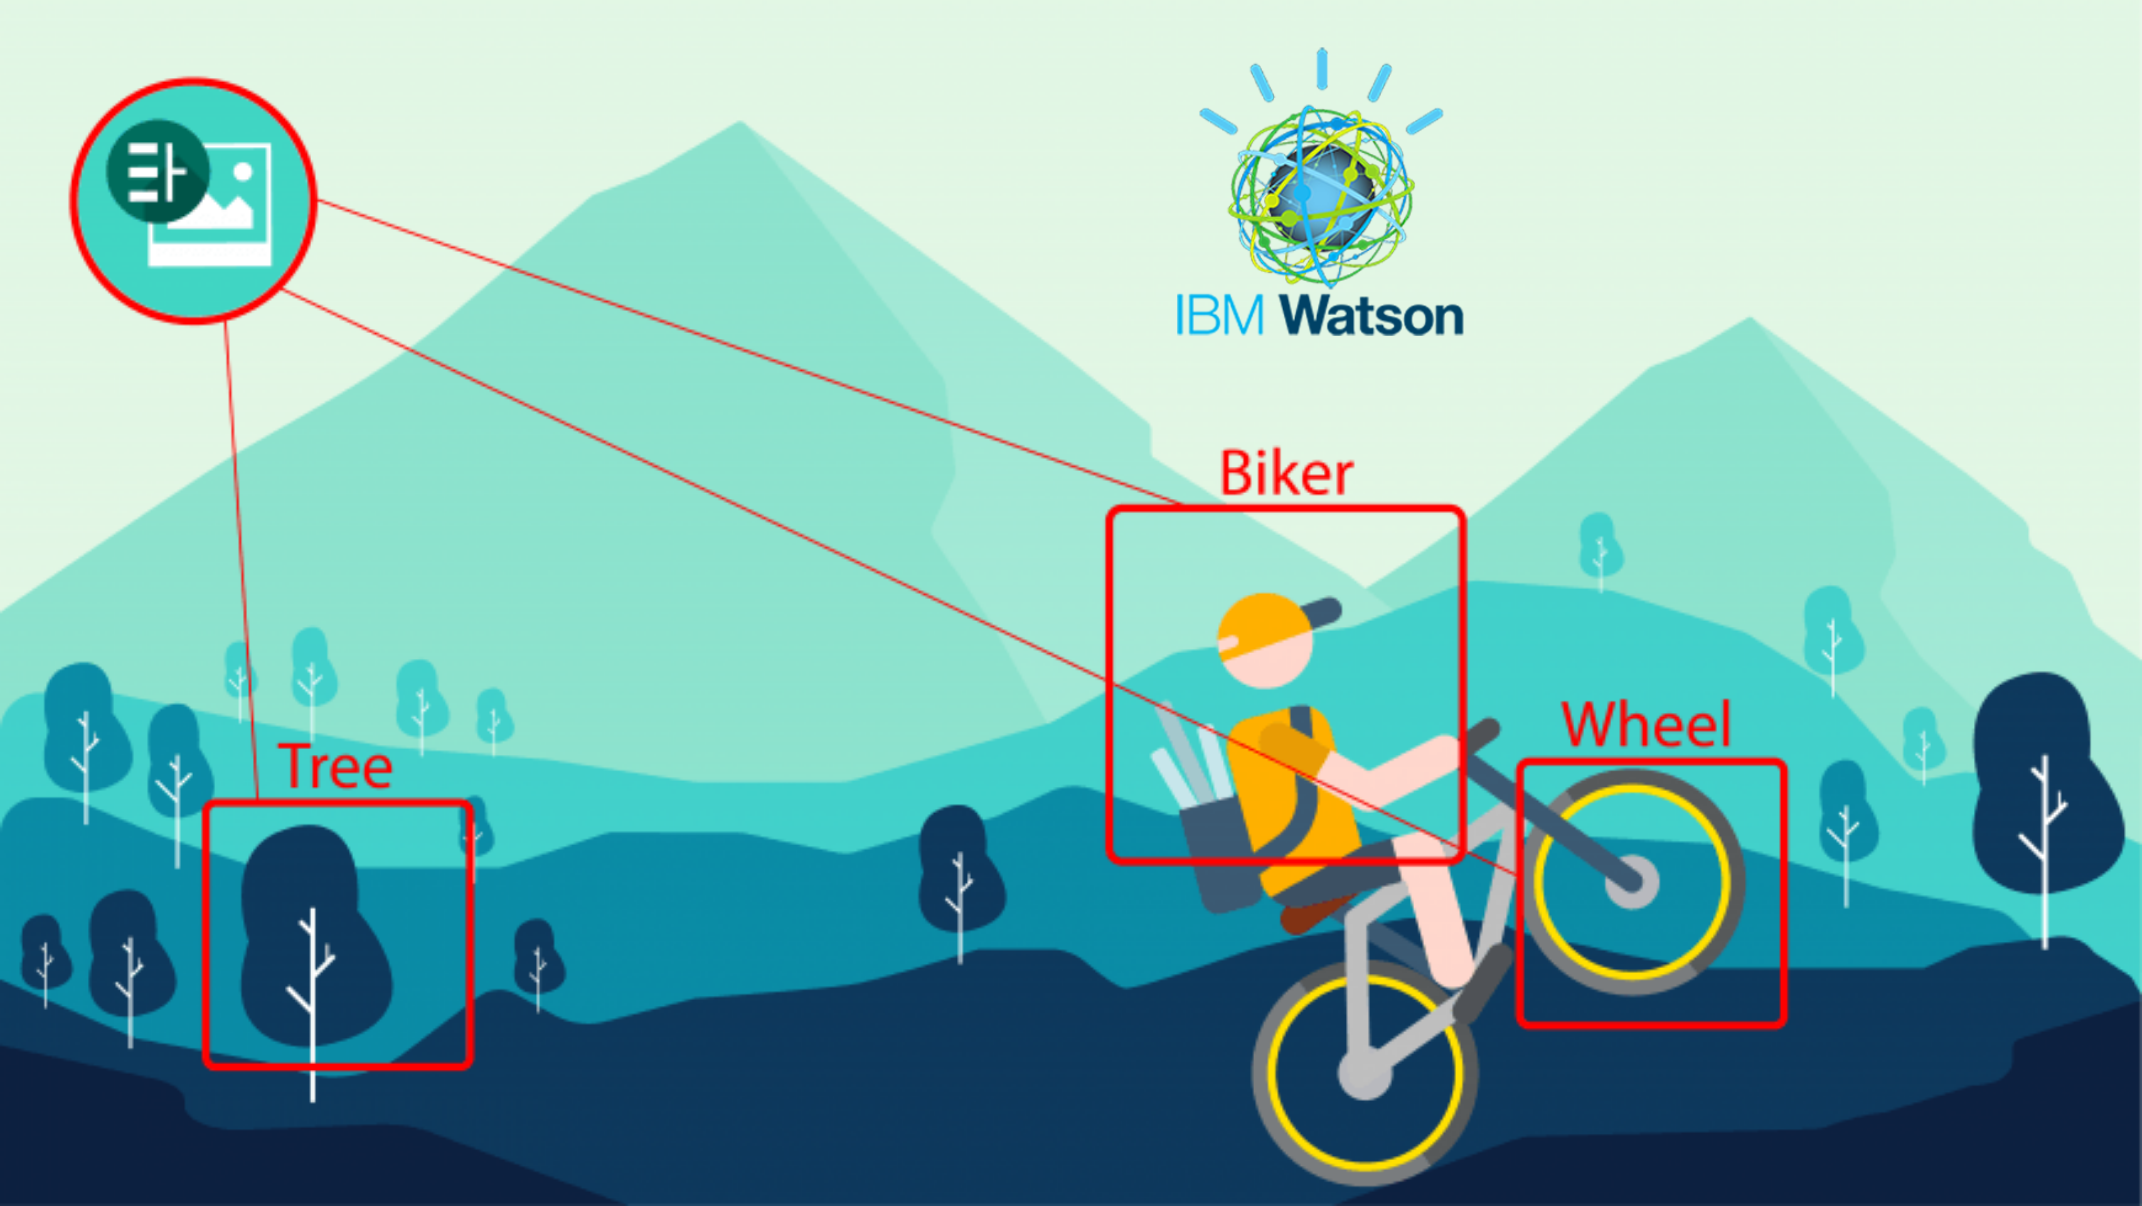
In our previous article about the IBM Visual Recognition API, we saw how we could use the API to build applications using pre-trained models from in various fields. We used the Food Recognition API to identify food in images. It worked very well. However, there would be some foreseeable issues. Does the API cater to all food items around the world? The answer is no. Following are two Indian Dishes that I classified using the app we have built. The first image is an Indian snack, “Onion Pakoda” and the second is an Indian sweet, “Soan Papdi.”


As you can see, both the images got misclassified. Well, a lot of Indian dishes are not available through the pre-trained API. It might not be the case just with food, but many types of images. To handle such situations, we need to train our models to classify our data.
IBM uses Visual Recognition Technology to allow us to build custom image models easily. In this article, we will go step-by-step on how to build a custom image model that learns to identify the two types of food items it has failed to recognize.
1. Data Collection
The very first step is to collect relevant data. There might be a chance that you might already have the images. However, if you don’t, then you can use the following method to download some relevant data. The data that we collect in this step is called the training data. We will use this data to train the machine learning system to identify the new food items.
1.1 Image Search
Use Google Image search to search for the food types.
1.2 Install an Image download Tool
We have to download images from Google. Since it will take significant time to download one picture after another, we can use a tool to download all at once. From the Chrome Browser store, download a plugin called Fatkun Batch Image Download
1.3 Download Images with Fatkun
Once you have the plugin installed, navigate to the image search page and click on the Futkun plugin button and select “this tab.“

From the image above, un-check the images that you find are not relevant. Once done, click the “Save Image” button on the top of the page to download the image. Was
Note: Before you download, remember to un-select “ask where to download image” option from the Chrome Browser settings. If you do not un-select it, then it will lead to hundreds of windows opening up asking you to click download each time. Trust me; you do NOT want to be in that situation!
When you start the download, Fatkun Plugin will create a folder and store all the images in it.
2. Creating Image assets and new classes on IBM Visual Recognition Technology portal
Once the training images have been downloaded, log in to the Visual Recognition Portal and click on the “Create Model” Button under the Custom box as shown in the image below.

2.1 Upload images
IBM suggests adding 10 images per class as a minimum. But you can upload as many as you like. More the images, better the deep learning algorithm can learn.
Click on the “browse” button on the “Upload to Project” section on the right side of the page and select all the images for the class that you have created.
Once the images have been uploaded, it can be seen in the list below the upload section.

2.2 Add Images to class
We now have the classes created and the images uploaded. The last step is to add images to the right class.
Click on the class that was created in section 2.1. In this section of the IBM Watson Studio page, click on the relevant images from the uploaded section located on the right bottom side of the page. Click on the “add to model” button. The result of this step leads to the selected images to be added to an un-classified class.

2.3 Assign the Right Class
The final task to this step is to select the unclassified section and select all the images under it.

Once all the images are checked, click on the classify button and select the “classify” button and enter the name of the new custom class. In my case, the class name is “Soan Papdi”. Once the new class name has been entered, submit the changes.
2.4 Repeat The Process
To build a custom classifier, you would need to have a minimum of 2 classes. Repeat the steps from 2.1 to 2.3 to add all the different classes you want your model to be trained on.
I have two classes which I have created and added images to it. These classes are “Soan Papdi” and “Pakoda”. There is a size restriction of 250 MB on the images that have been uploaded.

3. Training the Model
With the training data prepared and segregated as classes, we are now ready to train the model.
Click on the “Train model” button located on the top right part of the Watson Studio.
Training might take time to complete based on the images, and accuracy that needs to be attained. For around 30 images, the platform took about 6 minutes to train the model.
All the trained models and images can be found under the Assets section of the project page.

4. Testing the Model
Once the model is trained, it’s time to test and see if the model performs as expected. From the Assets Page, select the latest model that has been created. From the model page, navigate to the Implementation tab, where you will find the API endpoint to your newly trained model.
Select the new API endpoint and replace it in the source code for the simple web-application that we have built.


When we test it now with the new model that has been trained, we can see that the new types of food are being identified with a very good confidence score.
Conclusion
The IBM Visual Recognition Technology as an API is an extremely powerful tool. We have seen how not only existing models can be used, but how we can train our own models and benefit from the data we have.
The IBM Image-based solution platform is extremely scalable and that provides assurances to an organization that the application will be available when most needed.
With this part, we have shown how easy it is even for a non-technical person to try to build projects and test the results on applications that use machine learning.
interested in attending the IBM code Day 2019? join me!
Thanks a ton Akshay. Especially for Fatkun. It’s pretty handy and saved me the trouble of writing scripts.
Glad you found it useful!