
The title of this article might confuse people who are out of our Python circle. I’m sure they will be trying to make literal sense out of it. However, for Python coders like you and me, the Flask framework is a life saver.
Consider this scenario. You’ve written an amazing script to either process images or a script to perform a mathematical operation. It can be any script that you write. Now, what if you could expose this functionality to others around the world in a secure way? All they would do is give you the input and you will be returning the output.
This communication which happens between you and the other device is through the REST interface. In this article, you and I will go through what REST is and how Flask can be used.
What is REST?
In simple terms, REST is an architecture used by devices connected to the internet to talk to each other. When a device follows REST guidelines, it means that the device is participating in a stateless communication.
A stateless communication means that the server will not hold context of previous communications. So when a client requests the server for some information, the request ( which is made over the REST architecture) must contain all information necessary to the server to fetch that information and respond back to the client.
A classic example is when you type “www.google.com” in your web browser, a rest call is made to google server to get you the web page. REST architecture uses a set of verbs which indicate what operation needs to be performed by the server. Examples, of the verbs are GET, POST, PUT, DELETE, etc.
- GET – The GET request as the name suggests is used by clients to get some information from the server.
- POST – A POST request is made by clients when it wants to push some data to the server.
- PUT – This request is made when some data which already exists in the server needs to be modified.
- DELETE – This as the name suggests, is used to delete data that is present on the server.
Python REST API
We can use the REST framework in Python to expose the methods and functionalities that we write to other people on the internet. This process is called building APIs.
APIs ( Application Programming Interfaces) are used to expose parts of your application for others to use. You will be able to give access to people to consume your functional blocks without giving them the code on how to do it.
Let’s take an example. You have built an application that recognizes people in a given image. You want to provide this feature to companies who need face recognition services. To provide for this capability, you shouldn’t give them the code and ask them to run it on their system. Instead, what you do is build an API and provide them with the request and response format.
A request and response format is what tells them how they can send their video feed or images to your system and how you will return back to them a response of who has been identified in the video or image. That way, your code stays with you and you can start to monetize every request they send. You are effectively providing them with a service through your APIs.
In Python, you can use Flask to achieve this. The flask framework provides you with a simple and easy to use interface, to expose REST APIs. Let’s get started with using Flask and see how we can expose it.
Install Flask
Installing flask is simple. use the following command:
sudo pip install flask
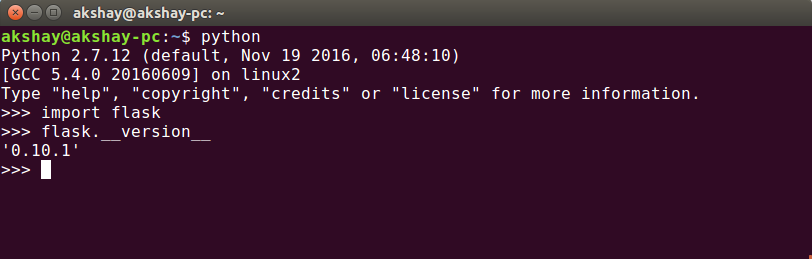
check the image below to make sure that flask is installed correctly.
Create a Simple Script
Let’s begin by creating a simple script “gen_time.py” . The script that we will write will have two methods.
- Method 1 – get_timesptamp_millis() – this method gives the current date and time in milliseconds as a long integer.
- Method 2 – get_datetime() – this method accepts a long integer ( time in milliseconds) and returns the date and time.
"""
script to give datetime and millisecond time conversion functionality
"""

import datetime
import time


def get_timesptamp_millis():
    """
    method that return the current date and time as a millisecond integer
    :return: integer
    """
    current_time = time.time()
    time_millis = int(round(current_time * 1000))

    print "time in millis is:", time_millis

    return time_millis


def get_datetime(millis):
    """
    method that takes in milliseconds integer and returns date time in format dd/mm/yyyy hh:mm:ss
    :param millis:
    :return: datetime string
    """
    date_time = datetime.datetime.fromtimestamp(millis/1000)

    print "the date time is:", date_time

    return date_time


if __name__ == "__main__":
    """
    this is run when the script is started.
    """
    millis = get_timesptamp_millis()
    date_time = get_datetime(millis)
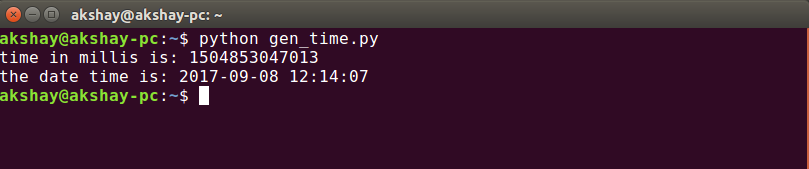
The following image shows the output of running the script:
Now that we have the skeleton ready. We will proceed to convert this script to a REST API which can be exposed to the internet. This tutorial is for beginners obviously. If you want to dig deep or learn advanced technique, then I would suggest you take up the REST APIs with Flask and Python![]() course and write scalable APIs to be deployed on cloud and provided to people all around the world.
course and write scalable APIs to be deployed on cloud and provided to people all around the world.
Convert to REST APIs
First, let’s see how flask exposes a method as a Rest API. Once we initialize the flask app in out code, for each method we have to denote a configuration. This config has the syntax “@app.route(<route>. methods=[])”. As you can see, the config has two parts-
- Route – the route tells it at what path the method should be called. For example, if your local URL was “http://localhost:5000”, then you can expose your methods on the routes “/timestamp” to get the timestamp and “/datetime” to get the date time. so, the full path to access the timestamp route is “http://localhost:5000/timestamp” and similarly, the full path to access the datetime will be “http://localhost:5000/datetime“.
- Methods – The methods part of the config indicate all the different REST verbs (GET, POST, PUT, etc) that are applicable to the method. So, in our case, the get_timestamp() method will be a “GET” request and the get_datetime() method will be a POST method. A single method can have more than one method at a time as well.
With the config sorted out, here is how the script would look like when we integrate it with flask:
"""
script to give datetime and millisecond time conversion functionality
"""

import datetime
import json
import time

from flask import Flask, request

# this is how we initialize a flask application
app = Flask(__name__)


@app.route("/timestamp", methods=["GET"])
def get_timesptamp_millis():
    """
    method that return the current date and time as a millisecond integer
    :return: integer
    """
    current_time = time.time()
    time_millis = int(round(current_time * 1000))

    print "time in millis is:", time_millis

    return str(time_millis)


@app.route("/datetime", methods=["POST"])
def get_datetime():
    """
    method that takes in milliseconds integer and returns date time in format dd/mm/yyyy hh:mm:ss
    :return: datetime string
    """

    # the time in millis will be in the request body and we cn access it using the request object provided by
    # the flask module

    request_body = json.loads(request.data)
    millis_time = int(request_body["millis"])
    date_time_gen = datetime.datetime.fromtimestamp(millis_time / 1000)

    print "the date time is:", date_time_gen

    return str(date_time_gen)


if __name__ == "__main__":
    """
    this is run when the script is started.
    """

    # this is how we run the flask server, once the script is run
    app.run(host='0.0.0.0', threaded=True)
The moment you run this code, it will deploy the flask application on port 5000. so, the application will be available on “http://localhost:5000” url. We can test the application as follows:
Testing Timestamp API
To test out timestamp API, open a web browser and type the following URL “http://localhost:5000/timestamp”. you will get an integer like the image below:

So, that is my current timestamp while writing this article. Lets, use this value “1504854852566” and see if it gives the correct date time in the format we want. To test out POST request, a browser cannot be used directly. So, I have used a tool called POSTMAN to help me make a post request to my flask server. Postman is a chrome extension which you can get from here.
The image below shows the data that I have sent and the response I got from the flask server through post request.
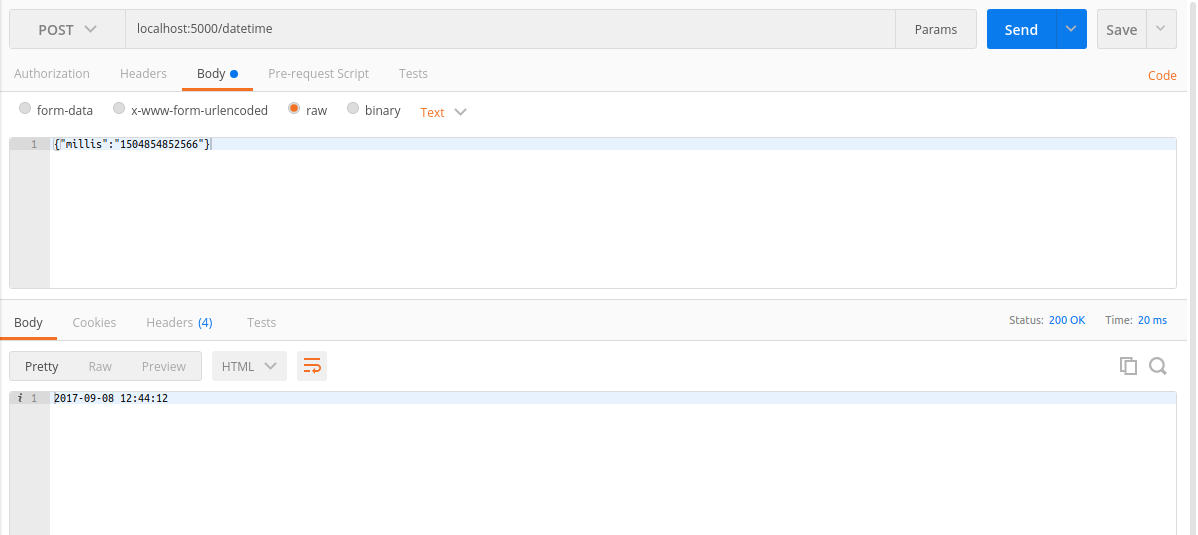
In the image, “{“millis”:”1504854852566″}” indicates the request body or the payload, and the response got is ” 2017-09-08 12:44:12″ which is correct. Note that I have to use the “/datetime” route to access the date_time method.
Conclusion and Next Steps
This was an introduction to RESt and how FLask can help you expose any Python method that you have written to the web. How you can let other people on the internet use your service without you giving your code. it is simple. But there is lots more to it.
More advanced concepts such as CORS requests, handling Images, handling a lot of web requests, load balancing is possible and a great skill to have for web and API development. All these topics and much much more is covered in an amazing course REST APIs with Flask and Python![]() that you can enroll to and learn from. Do not miss out on the opportunity. Create amazing services and expose the cool things that you build. The course will take you on a step by step journey to build a scalable, secure and efficeint APIs for your applications.
that you can enroll to and learn from. Do not miss out on the opportunity. Create amazing services and expose the cool things that you build. The course will take you on a step by step journey to build a scalable, secure and efficeint APIs for your applications.


This is one of the best tutorials on the internet about REST APIs that i have come across. It’s so simple that even a beginner can understand what it’s all about. Many tutorials on REST APIs make it sound like something very complex that requires a PhD to understand.
Thanks, Swelve! Glad you Liked it. Hope you have subscribed to my blog. I am planning to write more articles on Flask to do much more than simply posting and receiving of data. It is not that difficult to learn.